10 Tips for Choosing a Classroom Speaker System

A classroom speaker system is not simply a louder voice at the front of the room. It must help students hear clear speech from the back row, beside a humming projector, or during group work. The room itself matters. Dr. Carol Flexer, an audiologist and auditory-learning expert, is widely associated with the reminder: “If a child can’t hear, a child can’t learn.” That idea is a useful starting point, though a speaker alone cannot solve every listening problem.

Acoustics provide a practical benchmark. ANSI/ASA S12.60 sets recommended limits for classroom background noise and reverberation, including a 35 dBA background-noise limit for many core learning spaces. These figures highlight why a system should be judged in the actual room, not only by its advertised wattage. Research published in the Journal of the Acoustical Society of America has also examined how classroom noise affects children’s learning and academic performance. Clear sound is part of the learning environment.

The right choice depends on room size, ceiling height, teaching style, connectivity, and accessibility needs. A small speaker may sound fine during an empty-room demo, then struggle when chairs scrape and students talk. That happens. The following ten tips focus on coverage, sound clarity, setup, durability, and ease of use. They also leave room for an honest question: will this system help every student follow the lesson, or merely make the teacher louder?

10 Tips for Choosing a Classroom Speaker System

Assess Classroom Size, Layout, and Listening Needs

A classroom’s square footage is only part of the picture. Tall ceilings, hard floors, and narrow rows can make speech echo or fade. Walk to the back corner during a normal lesson. Can you hear a quiet student without straining? That small test may reveal more than a room diagram.

Match speaker coverage to the actual layout. In a long room, one loud speaker at the front can leave students near the back struggling to follow. Several well-positioned speakers may provide more even sound at a lower volume. Keep them clear of cabinets and other obstructions, and consider where students sit, move, or work in groups. Small rooms need care, too. Excessive volume can feel harsh.

Think about listening needs across the school day. A teacher’s natural speaking voice, a video, and a group activity place different demands on a system. If students often ask for repetition, check speech clarity from different seats before increasing volume. Test during a typical class, with chairs occupied if possible; an empty room can sound misleading. There is no perfect layout. Reassess after desks move, because even a modest change can create a new quiet spot.
Compare Speaker Types and Sound Coverage

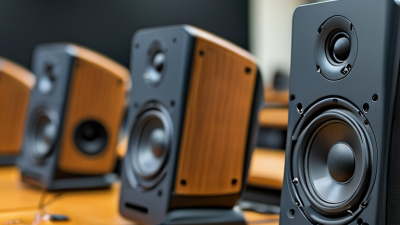
Choosing a classroom speaker starts with the room, not the wattage printed on a box. Ceiling speakers can distribute sound across fixed seating, but installation may be difficult in older rooms. Wall-mounted models direct sound toward desks and often suit rooms with clear sightlines. Portable speakers move easily between group activities, though sound may fade near the back of a large classroom. Small rooms need less.

Walk the room while playing ordinary speech at a moderate volume. Listen from the last row and beside noisy vents. If students strain to hear consonants, turning up the volume may make the front rows uncomfortable without fixing coverage. Check microphone compatibility, then test the system with doors, fans, and furniture in place. A quick test. Coverage charts are useful, but ceiling height, room shape, and soft surfaces affect what students actually hear. One corner may still sound dull; note it before choosing a speaker type or layout.

Evaluate Audio Quality, Power, and Connectivity

Clear speech matters more than impressive volume in a classroom. Test a speaker with a teacher speaking from the front and a student listening near the back. Can listeners distinguish quiet consonants without straining? Listen closely. Music can sound rich during a quick demonstration, while spoken instructions become muddy during a lesson. A hallway test may also mislead, because an occupied room absorbs sound differently.

Match power to the room, not just its floor area. Consider the number of students, ceiling height, background noise, and where the speaker will sit. A unit pushed near its limit may distort during energetic activities, yet excessive volume can make nearby seats uncomfortable. Leave some headroom. If possible, try the system at normal teaching volume from several seats. One detail is easy to overlook: the teacher should not need to stand beside the speaker to be heard clearly.

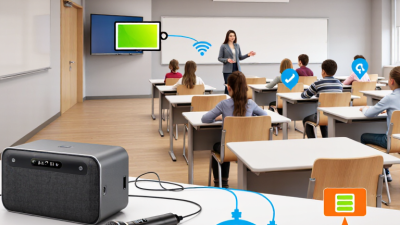
Check connectivity against the devices teachers actually use, such as laptops, tablets, and document cameras. Confirm that the needed wired inputs are available, and test wireless pairing before a lesson begins. Wireless convenience is useful, but delays can make video sound out of sync. Check whether multiple devices can connect reliably, and whether switching between them feels simple. I would not judge this from a feature list alone; a short trial with the classroom’s own devices can reveal awkward controls or dropouts.

10 Tips for Choosing a Classroom Speaker System - Evaluate Audio Quality, Power, and Connectivity
Use these practical checks to compare systems. Power and coverage needs vary with room size, layout, background noise, and speaker placement.
# Selection tip What to evaluate Practical guideline
1 Prioritize speech clarity Listen to spoken words from the front, middle, and back of the room at normal teaching volume. Choose clear, natural-sounding speech without harshness, distortion, or excessive bass.
2 Check even coverage Consider room dimensions, seating layout, ceiling height, and possible sound-blocking areas. Confirm that students in every seat can hear clearly; multiple distributed speakers may suit long or wide rooms better than one loud speaker.
3 Match power to the room Compare continuous (RMS) amplifier output, speaker sensitivity, speaker count, and intended listening level. Small rooms may need less output than larger or noisier rooms. Treat wattage as one factor, not a stand-alone measure of loudness or coverage.
4 Compare RMS and peak ratings Check whether published power figures describe continuous output or short-duration peak output. Use comparable RMS ratings when evaluating systems; peak figures alone can make products difficult to compare.
5 Inspect wired connections Check for inputs suited to classroom equipment, such as 3.5 mm audio, RCA, or balanced XLR connections. Confirm that the system can connect to the teacher’s computer, display, or other required source without a chain of adapters.
6 Assess wireless connectivity Check Bluetooth support, pairing steps, connection stability, and whether more than one device can be paired. Test wireless audio in the actual room. Keep a wired option available for presentations where dropouts or audio delay would be disruptive.
7 Plan for microphones Determine whether teachers need a handheld, headset, or lapel microphone and whether the system supports the required input. Check microphone level controls and feedback behavior; place microphones and speakers to reduce the risk of squealing.
8 Consider room acoustics Hard floors, bare walls, and high ceilings can create reverberation that reduces speech intelligibility. Do not assume more volume will fix echo. Test placement and, where possible, address reflective surfaces or use multiple well-positioned speakers.
9 Check controls and daily usability Review volume access, input selection, startup behavior, and whether settings are easy to understand. Prefer straightforward controls that teachers can operate quickly, with clearly labeled inputs and predictable volume settings.
10 Verify installation and support needs Consider mounting, cable routing, power access, ventilation, serviceability, and warranty coverage. Confirm that the setup fits school safety requirements and can be maintained without disrupting lessons.
Final check: audition the system with speech and typical classroom content in the room where it will be used.

Plan Installation, Controls, and Accessibility

Before selecting a classroom speaker system, map the room and note ceiling height, seating, and likely speaker positions. A unit mounted above a whiteboard may sound clear nearby but weak at the back. Measure twice. Check power outlets, cable routes, and nearby projectors or ventilation fans before installation. Those details can affect both placement and sound quality. Ask a qualified installer to secure ceiling-mounted equipment and test coverage from several student seats, not just the teacher’s desk.

Controls should be easy to reach and understand during a busy lesson. A teacher should be able to adjust volume without opening an app or searching through several menus. Keep it simple. Label wall controls clearly, and check that settings cannot be changed accidentally. Accessibility needs planning, too. Test speech at a comfortable volume across the room, and ask staff and students whether voices sound clear. Consider compatibility with assistive listening equipment and classroom microphones where needed. Test it early. One small flaw in the plan: a quick sound check in an empty room may not reveal how voices carry once students arrive. Recheck the system during a real class, then adjust speaker direction or levels if needed.

Classroom Speaker Planning: Sound Level vs. Distance

In an ideal free field, sound from a point source drops by about 6 dB each time listening distance doubles. Use this as a starting point when planning speaker placement and controls; classroom reflections, furnishings, and room layout affect actual levels. Check audibility from the farthest seats and provide accessible volume controls.

Balance Cost, Reliability, and Long-Term Support

A classroom speaker system is a long-term service decision, not just a line in the equipment budget. Compare the purchase price with installation, replacement parts, technician time, and warranty coverage. AVIXA’s 2024 Industry Outlook and Trends Analysis projected global professional audiovisual revenue to grow from about $325 billion in 2023 to $402 billion by 2028. That market growth signals expanding investment, but it does not guarantee that a particular system will be easy to maintain. Ask for documented repair procedures, parts availability, and a clear support contact. Get those details in writing.

Reliability starts with the room. ANSI/ASA S12.60 sets classroom guidance including a 35 dBA background-noise limit and a 0.6-second reverberation-time target for many core learning spaces. A system that sounds clear in a quiet showroom may struggle beside a ventilation grille or hard hallway. Test speech from the back row, with the room occupied if possible. Small details matter.

In practice, room drawings can miss where noise gathers, so leave budget for commissioning and adjustments. That part is easy to underestimate. Compare support terms by response time, repair turnaround, and whether staff training is included. A low bid may still be sensible, but only if replacement parts and service remain available after installation. Keep a small contingency for unexpected wiring or acoustic fixes.