A classroom can feel quiet while students at the back struggle to hear a teacher’s instructions. A classroom amplification system helps distribute speech more evenly, but different rooms need different solutions. A small teaching space may work well with a portable voice amplifier and a wireless microphone. A larger room may need fixed speakers mounted on walls or in the ceiling. Soundfield systems spread the teacher’s voice around the room, while assistive listening options can support students with specific hearing needs.
This guide explores the top types of classroom amplification systems and explains how their designs affect daily teaching. It considers portable, installed, and soundfield setups, along with their microphones, speakers, and common uses. Room size, background noise, mobility, and ease of operation all matter. So does the way a teacher moves between a desk, whiteboard, and student groups. Small details matter. A system that sounds clear during a demonstration may feel awkward during a busy lesson. No single option suits every classroom, and product claims should be checked against real room conditions. That distinction can be easy to miss. The aim is to give educators and decision-makers a practical starting point, not a one-size-fits-all answer.

Sound-field systems support speech across an entire classroom. A teacher wears a small microphone, and distributed loudspeakers carry their voice to students around the room. The aim is clearer speech, not simply louder sound.
A practical design target is a speech-to-noise ratio (SNR) near +15 dB at student listening positions. In simple terms, the teacher’s voice should measure about 15 dB above the background noise. This target can help, but room size, furnishings, ventilation, and student seating all affect results.
Good installation matters. Speakers should be spaced to provide even coverage, avoiding loud spots near the front and weak areas at the back. A sound-level check from several seats can reveal gaps.
Microphone placement matters too: clothing rub, distance from the mouth, and handling noise can reduce clarity. A system cannot fix every distraction. And +15 dB is a goal, not a guarantee; real classrooms change throughout the day.
Tips: Test the system during a typical lesson, with chairs occupied and ventilation running. Ask students at the back whether speech sounds clear, then adjust speaker levels or placement. Keep the microphone close to the speaker’s mouth, and check batteries before class. It may take more than one adjustment. Recheck after moving furniture, since even a small layout change can alter sound coverage.
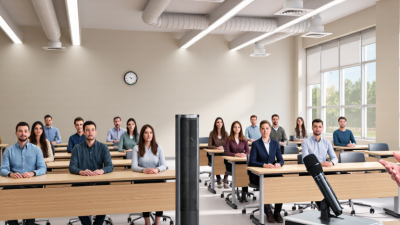
Personal FM/DM systems send a teacher’s voice from a small microphone to a receiver worn by one student. FM systems use radio-frequency transmission; DM systems send digitally encoded audio. The direct signal can make speech clearer when classmates whisper, chairs scrape, or ventilation hums. It does not make the room silent.
Depending on the design, the receiver may connect to hearing aids, cochlear implant processors, or headphones. A teacher can clip the microphone near the collar, then mute it during group work or side conversations. That small habit matters. If the microphone stays open, nearby sounds may travel too.
Good results depend on more than equipment. Staff should check comfortable volume, secure fit, battery charge, and clear sound at the student’s seat. A hearing-care professional can help match the receiver to the student’s listening needs; classroom staff can report what works during lessons. Test it during reading, discussion, and noisy transitions—not only in a quiet room. There is a trade-off: one voice is easier to follow, but peer comments may feel less accessible. Students may need a pass-around microphone or another way to hear classmates. It takes practice. The fit may feel awkward at first, and routines are easy to forget on busy days.
| System Type | How the Audio Link Works | Typical Equipment | How Students Listen | Key Benefits | Practical Considerations | Common Classroom Uses |
|---|---|---|---|---|---|---|
| Personal FM system | A teacher’s microphone sends speech by radio frequency to a student’s receiver. The student receives the teacher’s voice more directly than room sound. | Teacher-worn microphone and transmitter; student receiver; compatible listening accessory or hearing device. | Through a hearing aid or cochlear implant using a compatible connection, or through an ear-level receiver, headphones, or another supported accessory. | Can improve access to the teacher’s speech when distance, background noise, or reverberation makes listening difficult. | Radio channels may need to be selected or coordinated. Performance and compatibility depend on the equipment, room, and local radio-frequency conditions. | Whole-class instruction, discussions led by a teacher, and situations where a student benefits from a direct teacher-to-student signal. |
| Personal DM system | A teacher’s microphone and transmitter send speech digitally to a compatible student receiver. “DM” commonly refers to digital modulation. | Teacher-worn microphone and digital transmitter; student receiver; compatible hearing device or listening accessory. | Through a compatible hearing aid or cochlear implant connection, or another receiver-supported listening option. | Provides a direct speech signal; digital processing and available features vary by system and may support clear transmission in challenging listening conditions. | Transmitter and receiver must be compatible. Frequency bands, channel management, range, and other features vary; check local requirements and device specifications. | Classroom teaching, small-group instruction, and listening situations where a student needs the teacher’s voice delivered directly. |
| Single-student personal system | The teacher’s microphone signal is routed to one student’s receiver. | One teacher microphone/transmitter and one student receiver, with any required compatible connection accessories. | Individual listening through the student’s hearing technology or a supported personal listening device. | Allows the signal path and listening arrangement to be tailored to one student’s needs. | Requires an individualized setup, correct wearing and use, and regular checks of charge, connections, and microphone placement. | Individual support during lessons, tutoring, or classroom activities where one student needs a direct audio link. |
| Multi-student personal system | A teacher’s microphone signal can be received by more than one compatible student receiver, depending on the system configuration. | Teacher microphone/transmitter and multiple compatible student receivers or listening accessories. | Each student listens through their own compatible receiver and hearing or listening device. | Can provide the same teacher-speech signal to several students without requiring the teacher to speak separately to each one. | Receiver compatibility, channel setup, individual listening needs, and coordination with any other classroom audio equipment should be checked. | Classrooms where multiple students use personal listening technology and need access to the teacher’s speech. |
| Personal system connected to hearing technology | The receiver passes the teacher’s signal to a compatible hearing aid or cochlear implant, either through a direct connection or an approved accessory. | Teacher microphone/transmitter, receiver or interface, and compatible hearing-device connection. | Through the student’s hearing device; the precise connection method depends on the devices and fitting. | Can combine the teacher’s direct signal with the student’s prescribed hearing technology. | A qualified hearing-care professional or school audiologist can help confirm compatibility, fitting, settings, and appropriate use. | Instruction for students who use hearing aids or cochlear implants and have a recommended remote-microphone arrangement. |
Infrared classroom amplification sends a teacher’s voice from a microphone to receivers using invisible light. Because infrared does not pass through walls, sound stays largely within the room. That can suit schools with adjoining classes or shared spaces. The boundary is useful, but it is not magic.
Room acoustics still matter. ANSI/ASA S12.60 recommends unoccupied background noise no higher than 35 dBA and reverberation time no longer than 0.6 seconds in qualifying core learning spaces. ASHA’s classroom-acoustics guidance recommends a speech-to-noise ratio of at least 15 dB for students. Amplification can help, but it cannot erase a loud ventilation fan or long echoes.
Test the system from the back row, beside windows, and behind likely obstructions. Some receivers may be affected by strong sunlight or blocked emitters. Small detail. Check it in the actual room. Shared receivers also need clear charging, cleaning, and handoff routines; otherwise, the equipment may sit unused. Infrared coverage can be precise, yet seating changes may expose weak spots. A brief real-room trial is more informative than a tidy floor plan.
Infrared classroom systems transmit audio using light that generally stays within the room because walls block it. This can help limit audio spill into neighboring shared spaces, though receiver placement and clear signal paths matter. The bars show common carrier frequencies; they are not a ranking, and the frequencies available vary by system.
Networked speaker systems connect classroom speakers through a shared audio network, allowing staff to send announcements to selected rooms or entire buildings. A principal might broadcast a safety update to one wing while lessons continue elsewhere. This zoning is useful in schools with several floors, libraries, and shared spaces. It also reduces the need to treat every room as a separate audio setup.
Good zoning depends on thoughtful planning. Rooms with similar schedules can share a zone, while noisy gyms or cafeterias may need separate volume controls. Staff should be able to choose zones quickly, without navigating a complicated control panel. Test audibility from the back row and near the doorway. Walls, ventilation noise, and room layout can affect how clearly speech carries. More zones are not always better; overly complex controls can slow down urgent announcements.
Tips: Map rooms and daily routines before choosing zones. Check network coverage and backup procedures with qualified installers. Test announcements during normal class activity, not just in an empty room. Keep a simple room list beside the control station. Small details matter. A label that seems obvious to one person may confuse a substitute teacher.
ANSI/ASA S12.60 gives schools useful acoustic targets: background noise should generally stay at or below 35 dBA, while reverberation time should be roughly 0.6 to 0.7 seconds, depending on room size. These are room-acoustic benchmarks, not specifications for an amplification system. A ceiling fan, rattling vent, or hallway noise can compete with a teacher’s voice before any system is switched on.
Reverberation is how long sound lingers after a source stops. In a classroom, excessive echo can blur consonants and make a short instruction harder to understand from the back row. Measure background noise with building equipment operating, and assess reverberation under consistent room conditions. Then consider whether sound-field amplification, a personal microphone system, or another setup suits the space and students’ needs.
The figures help guide design, but they are not magic. A room may meet a target and still sound tiring during a lively lesson. Soft furnishings, ceiling treatments, and careful speaker placement can all affect what students hear. Listen from several seats, including near walls and under air vents. Check speech clarity, not just loudness. That practical step is easy to overlook.