Top Wireless Mic Setup Tips for Clear Sound

A reliable wireless mic setup begins before anyone speaks. Clear sound depends on more than a good microphone: frequency planning, transmitter placement, gain, and a careful soundcheck all matter. Shure wireless-systems expert Gino Sigismondi’s practical guidance can be paraphrased simply: plan frequencies before soundcheck, not during it. That step helps reduce interference when several transmitters share a busy room.

Start with the space. A venue’s Wi-Fi routers, metal staging, and crowded audience can all affect reception. Scan for available frequencies, then coordinate every microphone and receiver as a group. Keep receiver antennas visible and away from large metal objects. A small adjustment can make a real difference. Still, scans are not guarantees; conditions may change when doors open and phones fill the room.

Set the microphone gain while the speaker uses their natural voice. Watch the receiver meter, listen for distortion, and leave enough headroom for a sudden laugh or louder phrase. Place a lavalier mic near the upper chest, clear of collars and necklaces that might scrape against it. For handheld microphones, test the speaker’s usual distance and remind them not to cover the antenna. Details matter.

Walk the full stage. Listen at the edges, behind scenery, and wherever the speaker may turn away. Then check batteries, mute controls, and backup options. I’d still allow extra time: a clean meter reading can look reassuring, yet sound different in the room. Good setup comes from testing, listening, and adjusting—not from assuming the equipment will solve everything on its own.

Top Wireless Mic Setup Tips for Clear Sound

Understanding the Main Components of a Wireless Microphone System

Top Wireless Mic Setup Tips for Clear Sound

Understanding the Main Components of a Wireless Microphone System

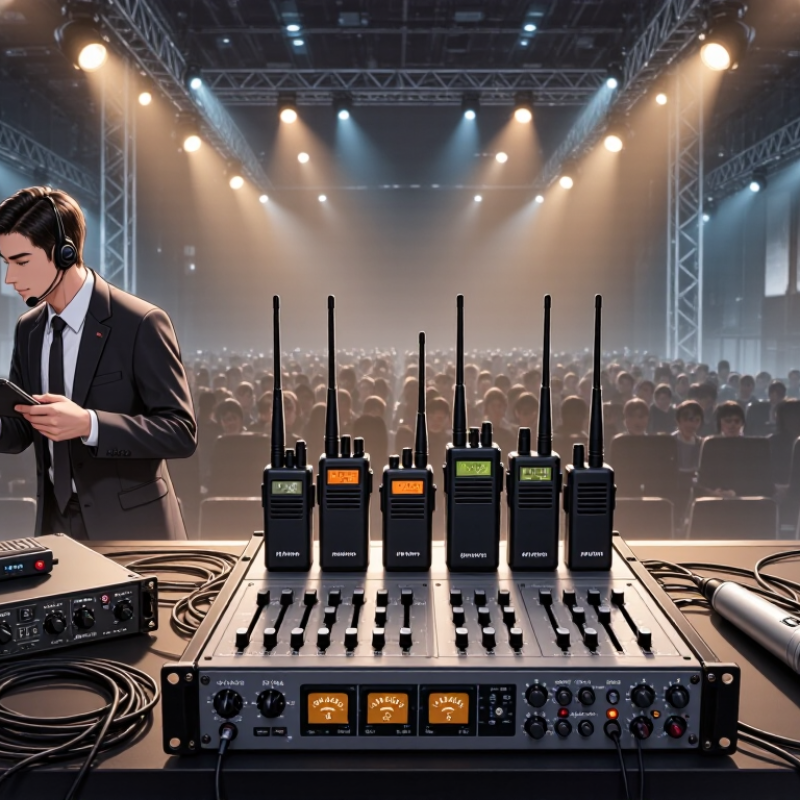
A wireless microphone system has a few parts that must work together: a microphone, transmitter, receiver, and output cable. The microphone captures the voice. A handheld unit usually contains its transmitter, while a lavalier mic connects to a small bodypack clipped to clothing. Keep that pack secure, and leave its antenna uncovered. Small details matter.

The receiver picks up the transmitter’s signal and sends audio to a mixer, recorder, or speaker. Its antennas need a clear path toward the mic; metal racks and crowded equipment can weaken reception. Before an event, check for competing signals and select a clean channel using the receiver’s scanning function, if available. Then test from the actual speaking position. A quiet room can hide problems that appear once people arrive.

The cable from receiver to mixer is easy to overlook. Confirm that its connector and output level suit the equipment you are using, then listen for hum, distortion, or dropouts. Check batteries before each session, even if the indicator looks reassuring. I would also speak at normal volume during the test; shouting can disguise poor gain settings. Wireless setups are convenient, but they are not automatically simpler. One missed connection can make a good microphone sound disappointing.

Choosing Clear Frequencies and Setting Up the Transmitter

Choose the frequency at the venue, not from last week’s notes. Nearby transmitters, wireless networks, and venue equipment can change what is usable. Scan with the receiver in the performance area, then test the chosen channel while people and equipment are in place. The FCC’s 600 MHz band plan assigns 70 MHz to mobile broadband services, a reminder that spectrum use changes over time. A previously clear channel may no longer be clear. Check current local frequency guidance before setup.

Set the transmitter’s gain while the speaker talks at their real performance volume. Watch the receiver’s audio meter: peaks should stay below clipping, but a weak signal can invite hiss. Keep the transmitter antenna unobstructed, and avoid folding or tightly coiling it against the body. Secure the pack so its position stays consistent. Small movements matter. Even a careful scan can miss interference that appears later, so monitor the signal during rehearsal.

Tips: Label the receiver’s selected channel, match the transmitter, and confirm both show a stable signal. Walk the actual route while listening on headphones. Then listen. If dropouts appear, rescan and retest rather than assuming the microphone itself is faulty.

Positioning the Microphone for Consistent Sound

For steady wireless-mic sound, keep the capsule a consistent distance from the speaker’s mouth. A practical starting point is 15–20 centimeters, slightly off-axis rather than directly in front. This reduces breath blasts without making the voice dull. Small changes matter. In a free field, the inverse-square relationship predicts about a 6 dB drop in direct sound when distance doubles. A speaker leaning back can therefore sound noticeably quieter, even if the transmitter stays put.

Clip the microphone securely near the upper chest, away from loose fabric, jewelry, and hair. Aim its pickup area toward the mouth, then ask the speaker to turn and speak naturally. Listen while they move, not only during a still test. IEC 60268-4:2018 sets out methods for measuring microphone performance; repeatable distance and orientation make practical checks more meaningful. Rooms are rarely ideal free fields, though. Reflections from a glass wall or hard desk can muddy speech, so test the actual room and shift the speaker or mic a few centimeters if needed. Keep the receiver’s antenna path unobstructed, and mark the clip position if several people will use the setup. One imperfect detail: clothing changes can shift the capsule, so recheck after each change.

Adjusting Audio Gain to Prevent Noise and Distortion

Wireless microphone gain is easiest to set during a realistic sound check, not a quiet room test. Ask the speaker to use their normal voice, then repeat the loudest phrase they expect to deliver. Watch the recording meter while adjusting input gain. Aim for peaks around -12 to -6 dBFS on a digital recorder, leaving room for sudden laughter or emphasis. Listen closely. A meter can look safe while the audio still carries hiss, clothing rustle, or room noise.

If the signal is too weak, raising gain later also raises background noise. Increase the microphone or transmitter input sensitivity in small steps, then check the receiver and recorder levels separately. Avoid pushing any stage into its red zone; clipped peaks sound harsh and cannot be repaired cleanly. A little headroom helps. Keep the microphone at a consistent distance, since moving it farther away often makes the voice thin and tempts you to add excessive gain. For a quick test, record ten seconds, listen through headphones, and check both the quiet gaps and the loudest words. I still find that a second check after the speaker settles into the room catches problems the first one misses.

Top Wireless Mic Setup Tips for Clear Sound — Adjusting Audio Gain to Prevent Noise and Distortion
Sound Source Starting Mic Placement Gain-Setting Check Useful Recording Peak Target If the Sound Is Noisy or Distorted
Conversational speech with a lavalier mic Clip the mic around 15–20 cm below the mouth, with the capsule unobstructed. Have the speaker talk at their normal level, then repeat the loudest expected phrase while watching the input meter. Aim for peaks around −12 to −6 dBFS on a digital recorder; leave headroom for louder words. If peaks reach 0 dBFS, lower the transmitter’s mic input gain. If the signal is very low, check placement and connections before raising gain.
Quiet speech or soft-spoken presentation Keep the mic in its usual position and reduce clothing movement or fabric contact. Set gain from the speaker’s actual delivery in the recording space, not from silence or a whispered test alone. Keep ordinary speech comfortably above the noise floor while retaining peaks below clipping. Move the mic closer when practical. Raising gain amplifies room noise as well as the voice.
Strong or projected speech Use the normal mic position; avoid pointing the capsule directly into breath or plosive airflow. Ask the speaker to deliver their loudest line during setup and lower input gain if the meter approaches its limit. Leave several decibels of headroom; peaks near −12 dBFS provide extra room for unexpected emphasis. Reduce transmitter input gain if distortion remains even when the receiver or recorder output is turned down.
Handheld interview speech Keep a consistent distance, typically about 10–15 cm from the mouth, and aim the mic toward the speaker. Test both interviewer and guest at their usual speaking distance and loudness. Set levels for the louder speaker, then confirm the quieter speaker remains clearly audible. Check mic distance and direction first. Avoid compensating for a distant mic by adding excessive gain.
Windy or noisy location Place the mic as close to the voice as practical and use suitable wind protection outdoors. Listen with headphones while the speaker talks and the surrounding environment is active. Use the same peak headroom target, but judge clarity by listening as well as watching meters. Improve mic placement and wind protection, or move to a quieter position. Gain cannot remove background noise.
Receiver connected to a camera or recorder Use a secure cable connection and select the input type required by the receiving device. Set transmitter gain first, then adjust receiver output to suit the camera or recorder input. Check the meter on the recording device; receiver indicators alone do not confirm the recorded level. If the receiver output overloads the device input, lower receiver output. If transmitter audio is already clipped, lower transmitter gain.
These are practical starting points, not universal device settings. Gain scales differ between systems. Make a test recording, listen back on headphones, and adjust the transmitter input gain and receiver output separately. Digital peaks must remain below 0 dBFS to avoid clipping.

Testing the Signal and Resolving Interference Before Recording

Before recording, test the microphone where the actual scene will happen. A quiet room at home may have a very different signal environment from a busy office or event space. Turn on the transmitter and receiver, then check the receiver’s signal meter. If the system offers a frequency scan, run it at the location and choose a clear channel. Follow the equipment’s instructions; scan features vary.

Listen through headphones, not just by watching the meter. Walk the speaker’s full route, turn around, and pause near walls, doorways, and other likely obstacles. Keep the transmitter’s antenna unobstructed when possible. Listen before rolling. A brief crackle or dropout matters. Check whether it comes from radio interference, clothing rubbing the microphone, or audio clipping. Those problems can sound alike in a rushed test.

If the signal drops, move the receiver closer and raise it above nearby equipment. Keep it away from routers, metal stands, and dense cable bundles, then test again. I’ve seen people trust a strong meter reading and skip the headphone check; it is an easy mistake, and not a useful shortcut. Also confirm battery levels and record a short test clip. Play it back. Sometimes the live monitor sounds fine, but the recorded track reveals a faint buzz. A backup microphone can help, though it does not replace checking the signal path.

Top Wireless Mic Setup Tips for Clear Sound: Test the Signal Before Recording

Illustrative field-test readings show signal-to-noise ratio (SNR) before and after scanning for a cleaner channel and adjusting receiver placement. Higher SNR generally means less interference relative to the wanted signal. Replace these example values with readings from your own setup, and test at the performer’s position before recording.